by Felicien | Feb 26, 2018 | Education
Making your website work for you involves much more than a polished design on your dot-com, but will it earn you a profit? Here’s a hint: Google can help you.
You’ve done it; you’ve made the leap. Your idea has become a reality, blossomed into a company, and you’ve designed a website.
Now what?
How effective is your website? More importantly, do you understand what makes your website effective? By “effective”, we do mean profitable. If you were asked what the most popular element of your website is, would you be able to answer? If you aren’t able to answer these questions, why haven’t you added Google Analytics to your website yet? You can’t afford to wait any longer!
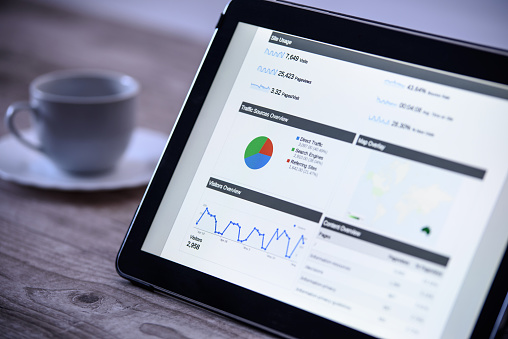
Google, the most trusted name AND the de facto authority in all things search engine-related, offers its Google Analytics service to help you understand just how your website is working for you – and where it’s not. Google Analytics gives you unbelievable insights into ways to make your website working smarter AND harder. Did we mention this fantastic tool is free?
What are you waiting for?
To start, you add a snippet of code text to your website’s source code and begin tracking everything you could ever want to know about anyone who comes to your website. We understand the phrase “source code” might sound like a foreign language to a lot of readers, but we promise this is painless – and Google makes sure to provide easy-to-follow video tutorials that aid anyone in getting started.
Getting started is simple:
Set up a Google account. If you already have one, just sign in
https://www.google.com/analytics/
Set up a web property:
Click “Admin”, then choose the account if you have more than one
In the “Property” column, click “Create new property”, and select “Website”.
Enter the full URL, including the “http://”.
Choose your Industry category, Time Zone, and click “Get Tracking ID”.
That’s it – you’ve now created a Google Analytics account and retrieved your Tracking ID snippet! How do you add this to your website? Your tracking code snippet will look something like this, but ‘GA_TRACKING_ID’ will be your tracking ID, and often looks like ‘UA-XXXXXX-1‘:
<!– Global Site Tag (gtag.js) – Google Analytics –>
<script async src=”https://www.googletagmanager.com/gtag/js?id=GA_TRACKING_ID”></script>
<script>
window.dataLayer = window.dataLayer || [];
function gtag(){dataLayer.push(arguments);}
gtag(‘js’, new Date());
gtag(‘config’, ‘GA_TRACKING_ID’);
</script>
You’ll add this code snippet to each page of your site you want to track right after the opening <head> tag on each page. Once this is in place, Google Analytics typically takes about 24 hours to being reporting traffic, though a quick visit to your website in a new browser tab will register your visit in Real-Time reports, thus eliminating your need to wait 24 hours and potentially waste an entire day (of profits).
A few items to remember as you start using Google Analytics:
Reports are unable to show website traffic history prior to set-up on your website.
Brand new websites will take time to “ramp up” in search rankings, and may limit search traffic coming to your site immediately. New sites can take up to 30 days for Google to index, but there are ways to expedite this if you’re willing to take a few quick steps. The fastest and easiest is a simple request form submitted to Google.
Take Google Analytics for a Spin
We recommend paying attention to a few key areas at first.
How is your traffic finding you? Google Analytics labels this “Acquisition”, and the main ways are:
Referring sites: These are sites that have sent visitors to your site from another site.
This is the full list of your new best friends.
Organic: This is traffic that has discovered your website through search terms, “keywords”, that visitors are typing into search engines and clicking links that bring them to your site – your favorite “freebie”.
Direct: This traffic is entirely made up of people that come straight to your website as if they clicked on a shortcut or typed your URL into their browser bar.
What do visitors do once they find you? This is “Behavior” in Google Analytics terminology:
See the entire visitor journey.
A key metric here is the Bounce rate; when a visitor lands on your site but then immediately closes the browser tab or window, or clicks the “back” button, this is registered as a “bounce”. The lower the bounce rate of your page or website, the better your site engages with your audience
Do you have a social media profile? While this is a critical marketing channel, it’s also a great opportunity to take Google Analytics for a test drive. Using a social media post that includes a link to your website, you can see the corresponding traffic within GA and determine the effectiveness of post content, and correlate Facebook reach to website visitors.
New Traffic Pattern Ahead
Over time, you’ll begin to see patterns, and note traffic spikes and dips as well as begin to predict traffic. Leave the visitor wanting more from your site with each page. The desire to see more will earn another click.
Which pages of your site are most popular? Go to Behavior -> Site Content -> All Pages, and see every page of your site and its corresponding traffic metrics. These can be sorted however you choose.
Want to see visitors resulting from social media but only those based in England? Want to see referral traffic AND their corresponding top destination pages? Add the Secondary Dimension to this view and see how visitors landed on each page or by which channel for an even clearer picture of your site’s performance.
Pay close attention to pages with high bounce rates, and the landing pages and exit pages. A bounce rate, as described above, is a wasted opportunity because the visitor isn’t engaged. A landing page is where traffic enters your site; adversely, exit pages are where traffic exits the site. Landing pages can be an indicator of external links that point to your site, and optimized accordingly, can attract visitors to continue to additional pages.
Google knows they have an incredible tool for websites, and won’t give everything away for free. At some point, you’ll encounter the most dreaded words for any Google Analytics user: “not provided”. Typically, these are enclosed in parentheses, “(not provided)”, and will come to represent the largest chunk of your traffic. These are visitors who are logged into their Google account while visiting, and Google restricts information shown to protect the privacy of Google account users. The good news is that Google will share more details with you – if you upgrade to a paid Adwords package or premium analytics account. A closer look at keywords will help with organic traffic, and perhaps a paid boost on your most effective keywords will “up the ante”.
A few more key features in Google Analytics we recommend trying out:
Behavior Flow – Flow charts that give you a high-level overview of popular patterns
Events – If your end goal is driving traffic to another site, like Facebook or Etsy, where you have limited reporting, Events will let you see how many times a set clickthrough is utilized, like a button to take a visitor to the Facebook page.
Conversion Goals – You establish a set of criteria that you define as a “conversion”, like signing up for an email newsletter or following the sales funnel completely through the checkout process for a purchase, and the conversion goal will give you insights about the transaction.
Audience details are best “guesstimations”, based on generalizations and cookies. Never assume that this information is 100% accurate, but it will be a good indicator.
Understanding your audience is the key to knowing what makes them “tick” – and what makes them open their wallet. Once you start actively using Google Analytics and tailor your site for search engine optimization, it’s amazing what doors may open for you.

by Felicien | Feb 23, 2018 | Education
Although the latest version of Windows 10 isn’t a “game changer” you should appreciate some of its newer options and enhancements like the new Start Menu, OneDrive, Action Center, Cortana and ability for it to adjust its interface according to the device you use. Read on to get up to speed with Windows 10.
Before we begin, it’s important to note a few things: Be sure to sign in with your Microsoft ID when you first set up Windows 10. This way you can sync settings across all your devices.
You’ll also see a change in terminology from Windows 8. All applications are now referred to as Windows apps as opposed to Metro, Modern or Windows Store apps. However, the term Universal app is still used to designate the ability to use an application across all your devices (desktop, tablet or smartphone).
Let’s Start with the Start Menu:
Windows retired the cumbersome Charms Bar and brought back the much-loved Start Menu. The Start Menu is where you go to operate everything in Windows 10. You remember how to do this, right? Go to the lower left of your screen to bring up the Start Menu. You’ll see that it’s now separated into sections. Plus, it’s more customizable than ever before – change from partial view to full view, customize the color, pin and unpin tiles and more.
Put your cursor over the top edge of the Start Menu and drag it up or down to enlarge or reduce it. You can also click “Resize” and select the options for Small, Medium or Large. Rename a group by clicking it and keying in the name you prefer. You can also do this with your unnamed groups. Try combining groups, dragging one to another, or creating a new group by dragging a tile to a blank area.
If you want to remove a tile, select “Unpin from Start,” and the tile will disappear. To expand the start menu from three to four columns, go to Settings>Personalization>Start, click “Show more Tiles” and set this to “On”.
The Settings page offers you other options to personalize your Start Menu. Here are a few more popular ones:
“Pin to Start” to move an app from the “Most Used” list to the Start Menu.
“Open File Location” to open File Explorer.
“Run as an Administrator” to run an application as an admin.
“Run as a Different User” to change the current user.
As you can see, there are many ways to customize the Start Menu.
All Apps:
With this option, you can view all the applications that you use the most. When you “right click” on it, Windows 10 brings up the files you’ve recently opened. Go to the top left of your screen to open the three horizontal lines (the “hamburger” menu). Here you’ll see all the Windows apps in alphabetical order. Some may appear as a folder with a down arrow showing that there are a number of options for this particular app. Simply click on what you want to use. To uninstall an app, open the Start Menu, go to Settings>System, select the app, and click the “Uninstall” button that pops up. Note: Some Windows apps like Weather and Mail can’t be uninstalled.
Account:
Go to this set of stacked icons at the bottom left of your screen. Here you can access your user account to sign in and out of Windows, change your account settings or lock your computer.
File Explorer, Settings, Power:
At the bottom left of your screen, you’ll find File Explorer, the file-browsing app previously referred to as Windows Explorer. Here you’ll also find the Windows Settings app with your System, Devices, Network & Internet, Personalization, Accounts, Time & Language, Ease of Access, Privacy, and Update & Security settings. Located here as well is the Power app where you can shut down, restart or put your computer to sleep.
Life at a Glance, Play and Explore, Unnamed and Live Apps:
The tiles for your Windows desktop applications are grouped into these categories. As you install new apps, they will go into the unnamed group. If you use the Enterprise Edition of Windows 10, your IT professional may have configured other groupings that appear on the right side of the Start Menu. Live apps are the ones where you’ll find real-time data like Mail, Weather, and News. Live tiles contain Windows apps but not desktop applications. Go to “Turn live tile off” if you want to stop real-time information from streaming into the tile. If it’s already off, you can choose “Turn live tile on”.
OneDrive:
Windows 10 automatically comes with OneDrive cloud storage. The setup is easy, and you should definitely take advantage of it. If you’re using the Windows 10 Fall Creators Update, OneDrive Files On-Demand allows you to access your OneDrive files from all your devices.
Windows Apps:
Previously, Windows apps could only be run from the Start Menu and not from the desktop. You could use multiple Windows apps in separate windows on your desktop along with your desktop applications, but this was very limiting. Now you can minimize, close or resize your Windows apps just like you do with your desktop applications, and you can more easily access all the features in your Windows apps. On the bottom or left of the app are icons you can choose from, and you can customize these to your liking. For example, you’ll probably want to customize your Mail app to add accounts, select a type of mail account, combine mail from different accounts into one inbox, and much more.
Using a Tablet or 2-in-1:
A new feature called Continuum detects the type of device you’re using and automatically adjusts the interface to suit it. For example, if you’re using a tablet with an attached keyboard, Continuum uses the desktop interface. When you disconnect the keyboard, it will ask you if you want to use Tablet Mode. Just click “yes” or click “Remember my response and don’t ask again” and Continuum will automatically switch to the right interface.
The Tablet mode in Windows 10 utilizes the touch and swipe gestures you’re familiar with. In the Start screen containing your apps, you’ll see six icons – three at the top and three at the bottom. The three at the bottom contains your user account, the Settings App, and the Power Icon. If you want, use the hamburger menu at the top to turn the screen black so the six icons contain text tables. Below this, you can tap the “Pinned Tiles” icon to fill your screen with tiles (the default interface). Or tap the “All Apps” to get a full-screen view of your Windows apps and desktop applications to quickly view and scroll to the ones you want. Interestingly, you will now need to scroll vertically rather than horizontally as you did before, but this is a minor inconvenience.
The Action Center:
The Action Center displays notifications such as new emails, maintenance and security reminders, and news settings. You can launch it in one of three ways:
Swiping from the right,
Clicking the icon in the taskbar, or
Selecting the Windows key + A.
The notifications will appear on the lower right and disappear on their own. You can adjust how many notifications are visible at once by going to the Action Center for any app. Three is the default Microsoft sets.
Many people find them useful, but if they bother or distract you, simply turn them off. Tap the notification and it will take you to the Task Manager where you can turn it off. (They will still be in the Action Center if you want to refer to them later.) You may want to keep the security and maintenance notifications on, so you remember to take necessary actions. Visit the Action Center – it’s pretty self-explanatory.
My People:
This was introduced in the Windows 10 Fall Creators Update. With My People, you can you pin your preferred contacts in the Windows taskbar, and quickly communicate with them without opening another application. To get going, click the My People button on the right side of the taskbar, and a Get Started button will pop up. Click this and the people you contact the most will appear. Pin them to the taskbar, or to add others, click “Find and Pin Contacts”. You can also scroll through communications and see all the messages you’ve exchanged, even your Skype video chats and instant messages.
The Edge Browser:
Internet Explorer has been replaced as the default with the Edge Browser. Why? Because it’s considerably faster, safer, cleaner-looking and easier to use. In “Reading View”, everything you don’t need is stripped off the page, including advertisements, sidebars, and other distractions. You can use the annotation tool (it looks like a pencil and paper) and note anything you want to share. Simply select how you want to share it and follow the instructions – the Edge Browser will handle the rest. Even better, when using the Edge Browser, Cortana can pop up and alert you with details you’re looking for.
Speaking of Cortana:
Cortana is a digital assistant that can search and help you find whatever you need on the Internet or on your computer. It’s set to turn on automatically when you start Windows 10. When you need help, type your question in the box to the lower left of your screen next to the Start button and Cortana will get to work for you. If you want to use Cortana’s voice assistant, go to your Settings menu to “Talk to Cortana” and in the section marked “Hey Cortana” turn the switch to “On”. After you do this, just say “Hey Cortana” and ask your question. You can use Cortana to browse, find files in your PC, and to locate various apps and settings.
Remember – technology works at its best when you know how to use it. The more you know about Windows 10, the better it’ll serve you on a daily basis. Be sure to put these 12 tips into practice the next time you start up your PC.

by Felicien | Feb 23, 2018 | Education
The dark web is a busy illegal market. To best protect yourself you need to know what items are in high demand, how much they go for, and how to best protect your information so that you don’t fall victim to this type of crime.
The Internet is a scary place – a black market web of illicit and illegal acts. The old saying that the best offense is a good defense applies to the Internet as well – to protect yourself you must know what is out there.
How often is it that portions of our identities are bought and sold on the web? What is secure and what isn’t? How much are people paying for personal information on the dark web? These are the questions you should be asking yourself.
What information is sold on the dark web
Price
Social Security
$1
General Non-financial institution logins
$1
Subscription services
$1-$10
Credit Debit card numbers without the CVV
$5-$110
Credit Debit card numbers with CVV
$10-$115
Loyalty accounts
$20
Driver’s License
$20
Online Payment Services
$20-$200
Fullz info
$30
Diplomas
$100-$400
Passport
$1000-$2000
Medical Records
$1-$1000
When it comes to protecting your personal information, often the first thing you think about is your Social Security number. Many believe it’s the only thing that gets routinely sold on the dark web. Surprisingly, the data shows that this is not in the least bit true.
Social Security numbers are only valued at $1. For less than the cost of a candy bar, you can buy a Social Security number, general non-financial institution logins, or subscription service logins such as Netflix or Hulu. Forbes magazine reported that in December of 2017 a file with 1.4 billion hacked and leaked passwords was found on the dark web. A bulk of these passwords and logins were for subscription accounts on Netflix, Last.FM, LinkedIn, MySpace, dating site Zoosk, adult website YouPorn, as well as for favorite games like Minecraft and Runescape.
Beyond subscriptions to streaming services, hackers gain make real money off of your personal information. For example, with just $5 you can afford to buy credits card numbers. If you want credit card numbers with the CVV number, it will cost you only an additionally $5. One of the more surprising items is that the dark web wants are loyalty accounts. For the cost of a typical gym membership, you can have a person’s loyalty account number or their Driver’s License number.
For about the cost of a dozen roses ($30), you can find all kinds of Online Payment services or “Fullz” info. Fullz information is an information bundle that includes a name, SSN, birthday, account number, and other data. This cost has gone down since 2015; in just two years’ time, Fullz information has dropped from $15-$65 to just $10-$30.
On the more expensive end of the dark web, you can find items from diplomas and passports, to even medical records. These can run you $100-$400 and $1000-$2000 respectively. These items being on the black market have their own repercussions. It begs the question of why medical records were worth so much more, in comparison to spending $1 for a Social Security number.
Jean-Frederic Karcher, the head of security at communications provider Maintel explains that “The main reason medical institutions and the NHS are targeted is that they have vast amounts of patient data at their disposal. Hackers can sell large batches of this personal data for profit on the black market”.
What causes the difference in cost for personal information on the dark web?
There are four main factors that impact the price of personal information. The first two elements are a fundamental economics equation where cost is dependent on the supply and demand. Another factor is the balance of the account – if the credit card has significant available credit, it will cost more. Same with loyalty cards that have a high stability of points. Lastly, the cost of personal data can be dependent on the ability to reuse the data. For example, a person would pay more for a credit card that they can use multiple times, as compared to a gift card they could use only once.
How are they getting this information and what can you do to protect yourself?
“According to the ITRC, data breaches in the United States during 2016 hit an all-time high of 1,093, which represents a 40% increase over the previous year.” Weak passwords and unmonitored accounts are the leading causes of identity theft.
Weak passwords
Often cybercriminals can gain access to this information from simple things such as poor password choices or weak antivirus software. Overlooking small vulnerabilities such as these gives opportunities for your information to be sold on the dark web.
Unmonitored financial accounts
To best protect yourself, you should monitor your accounts and statements for anything that looks suspicious. Hackers usually target people that they know they could get a good lead on. For example, an elderly lady, that can’t see that well, won’t be tracking her account like a younger person would be on a smaller budget.
Unmonitored credit reports
Thirdly, remember to check your credit report often. If you are subscribed to a credit report service, remember to keep copies of your report anytime they are requested. For example, if you buy a vehicle, or open a credit card, you should have a copy of the report sent to you as well. That way you can look for any discrepancies on your report and identify them right away.
Not reporting suspicious activity
Hackers also know that often their crimes won’t be reported. If you note something suspicious and don’t report it, you are giving them another leg up on you. The more time that goes by, the less likely it is that you will be able to recover. The Federal Trade Commission (FTC) tracks identity theft statistics, helps victims, and coordinates responses by various governmental agencies. The average company offers employees an average of 10 days of leave per year, which equals out to 80 paid hours of leave. The FTC reports that recovering from identity theft takes an average of six months and 200 hours of work. That would be over two years’ worth of leave accrual.
Knowing what is on the dark web is only half the battle – you should also know what is valuable on the dark web and what isn’t. You should know how these items are getting into the wrong hands so that you can best protect yourself and your information. Remember to use strong passwords and monitor your accounts and credit cards for any discrepancies. If you notice anything out of the ordinary you should report it right away. Don’t let your information end up on the dark web. Get a few steps ahead of these hackers today.

by Felicien | Feb 23, 2018 | Education
Cybersecurity facts you might not already know, that are affecting you right now and what you need to know to protect yourself and your business.
With the benefits of the Internet came negatives as well, like one of those group bundles that you have to buy together. In order to protect yourself from the negatives of the Internet, you need to know the cost of cybercrime, and how it can impact your business. These are 5 startling statistics about cybersecurity in 2018 and what they mean for companies of all sizes
Cybercrime will inflate to $6 trillion
Cybercrime will cost us $6 trillion annually within the next three years, which is twice what we paid in 2015. The Wall Street Journal estimated that the cost of cybercrime in the U.S. in 2015 was $100 billion. With cybercrime growing at this rate it is essential to ensure that your cybersecurity is rapidly progressing as well. This is more than the amount of money we spend combating all illegal drugs combined, which is a whopping $44 billion, just this year. In 2017 WannaCry ransomware worm held companies, large and small, to more than $100,000 in ransoms.
Cybersecurity costs are similarly inflating
It is reported that we will spend more than $1 trillion in combating these escalating cybercrimes. To gain some perspective, the US has spent $4.79 trillion on the War on Terror collectively from the countries of Iraq, Afghanistan, Syria, and Libya, since Sept 11, 2001. In 2017, WannaCry ransomware reached over 150 countries costing $4 billion in damage (apart from the ransom). This example is representative of the average cost of a cybersecurity breach – this does not count towards the costs of insurance, which usually doubles or triples the insurance premium after an attack.
Cybercrime overshadowing its counterpart
While cybersecurity tries to keep up with the inflation of cybercrime, it still falls short year after year. Cybersecurity positions remain underqualified and understaffed. The number of positions not filled will triple to 3.5 million by the year of 2021. Currently, to combat this, all IT positions are dual-purposed as cybersecurity positions as well.
Humans overpopulating their technological counterparts
Cyber attacks have shifted their focus from machines to humans. In 2017, there were 3.8 billion Internet users. This is staggering when you realize that this makes up 51% of the total world population. Even worse, this increase shows no signs of slowing or stopping anytime soon. It is calculated that by 2030, that there will be more than 7.5 billion Internet users. Within 12 short years, Internet users will increase from 51% to 90% of the total world population. More users mean more cybercrime.
Ransomware damage costs increase by 1500%
The cost of global ransomware is estimated at $325 million in 2015. By the end of 2017, this number had already multiplied to $5 billion. Again this growth is only predicted to get worse. By 2020, this should easily quadruple to $12 billion. It is reported that currently, more than 4,000 ransomware attacks happening each day. In 2017 a ransomware attack occurred every 22 seconds. By 2020 they will happen every 14 seconds.
So what does this mean for your company?
This means that just as fast as these criminals and attacks are occurring, you need to be preparing. You can prepare your business to survive these attacks by completing a few tasks. To be able to prepare, respond and recover from these attacks you need to train your staff, to know what current threats are out there, and develop cybercrime policies and procedures.
You can prepare for a cyber attack by keeping up to date on current cyber threats to your company. Over 2 million new malware attacks are launched every day. Recent examples of these hazardous cyber threats are seen in the Meltdown and Spectre bugs. Both Spectre and Meltdown could allow potential attackers access to your business’s data. Ransomware, crypto, and malware attacks are the top cybersecurity threats as reported by Forbes Magazine in 2018.
Responding quickly to a cyber attack is incredibly important. If you suspect a cyber attack, you need to immediately work to isolate it, so that it cannot spread through your entire business’ network. Then, you should identify critical assets of your organization so that you can protect those the most. Having a policy in place establishes what steps should be taken, and who is responsible for what. This will limit the confusion of trying to combat an active attack while directing everyone in what to do.
Recovering from a cyber attack should start with informing your customers. It is reported that one of the most significant costs of a cyber attack is the lost value in customer relationships and brand name. For example, Home Depot and Target suffered a combined total of $554 million in losses due to lost customer relationships and damage to their brand name. To avoid this, you should be transparent with your customers right from the beginning. Letting your customers know will ensure that you are saving yourself from class-action lawsuits, and protecting your business’ reputation. Explain your plan of action to clients so that they can understand that you are containing and correcting the problem. After assessing the attack, you should know which portions of your company have been affected and which haven’t. This way you can restore missing data from the previous backup, and address where there is still missing data.
Establishing policies and procedures aid in protecting your company but you should also consider software that can help detect and isolate cyberattacks. For example, in just one month’s time, Symantec software blocked an average of one million online attacks each day.
According to Microsoft, 20% of small to mid-sized businesses have been cybercrime targets. Small and medium businesses need to make sure they are protected just as well as large companies are. Hiring cybersecurity staff is not in everyone’s budget, but there are other options such as software that can automate detection of these attacks through your corporate network. The faster your business responds to an attack, the better your company will be able to recover.
Knowing these facts, ask yourself: what is your business doing to prepare? Being proactive is your best option – don’t sit idle while your world crumbles around you.

by Felicien | Feb 22, 2018 | Education
Is Cybercrime Keeping You Up At Night? Check Out These 20 Key Cybersecurity Tips To Help You Stop Stressing Out
Small businesses are often unprepared for the latest cybercrime tactics used by hackers today. The FCC recently published a helpful Cybersecurity Tip Sheet to help small business owners strengthen their defenses.
The U.S. Federal Communications Commission (FCC) reports that “theft of digital information has become the most commonly reported fraud, surpassing physical theft”. Hackers are constantly working to break through cyber defenses. Even worse, your small business is attractive to them because you’re an easier target than larger organizations.
Here are some shocking statistics:
43% of cyber attacks target small businesses.
60% go out of business within six months of a successful cyber attack.
48% of data breaches are caused by malicious acts. Human error or system failure are the cause of the remaining 52%.
While small business owners worry about cyber attacks, many aren’t allocating money in their budgets towards risk mitigation. Unless you take precautions to block hackers and computer viruses, you’re opening the doors of your business to cyber theft.
The FCC produced a one-page Cybersecurity Tip Sheet with the following advice for securing your small business:
Train employees in security principles.
Establish basic security practices and policies for employees, such as requiring strong passwords, and establish appropriate Internet use guidelines that detail penalties for violating company cybersecurity policies. Establish rules of behavior describing how to handle and protect customer information and other vital data.
Protect information, computers, and networks from cyber attacks.
Keep clean machines: having the latest security software, web browser, and operating system are the best defenses against viruses, malware, and other online threats. Set antivirus software to run a scan after each update. Install other key software updates as soon as they are available.
Provide firewall security for your Internet connection.
A firewall is a set of related programs that prevent outsiders from accessing data on a private network. Make sure the operating system’s firewall is enabled or install free firewall software that’s available online. If employees work from home, ensure that their home system(s) are protected by a firewall.
Create a mobile device action plan.
Mobile devices can create significant security and management challenges, especially if they hold confidential information or can access the corporate network. Require users to password-protect their devices, encrypt their data, and install security apps to prevent criminals from stealing information while the phone is on a public network. Be sure to set reporting procedures for lost or stolen equipment.
Make backup copies of important business data and information.
Regularly backup the data on all computers. Critical data includes word processing documents, electronic spreadsheets, databases, financial files, human resources files, and accounts receivable/payable files. Backup data automatically if possible, or at least weekly and store the copies either offsite or in the cloud.
Control physical access to your computers and create user accounts for each employee.
Prevent access or use of business computers by unauthorized individuals. Laptops can be particularly easy targets for theft, and can also easily be lost, so lock them up when unattended. Make sure a separate user account is created for each employee and require strong passwords. Administrative privileges should only be given to trusted IT staff and key personnel.
Secure your Wi-Fi networks.
If you have a Wi-Fi network for your workplace, make sure it is secure, encrypted, and hidden. To hide your Wi-Fi network, set up your wireless access point or router so it does not broadcast the network name (known as the Service Set Identifier, or SSID). Password protect access to the router as well.
Employ best practices on payment cards.
Work with banks or processors to ensure the most trusted and validated tools and anti-fraud services are being used. You may also have additional security obligations pursuant to agreements with your bank or processor. Isolate payment systems from other, less secure programs and don’t use the same computer to process payments and surf the Internet.
Limit employee access to data and information, and limit authority to install software.
Do not provide any one employee with access to all data systems. Employees should only be given access to the specific data systems that they need for their jobs and should not be able to install any software without permission.
Strengthen passwords and authentication.
Require employees to use unique passwords and change passwords every three months. Consider implementing multi-factor authentication that requires additional information beyond a password to gain entry. Check with your vendors that handle sensitive data, especially financial institutions, to see if they offer multi-factor authentication for your account.
In addition to the FCC’s Tips above, be sure to do the following:
POS and Payroll
Any devices that handle sensitive information like payroll or point of sales (POS) devices should be on a separate network from computers that access web pages or check email.
Strictly enforce your cybersecurity policies and practices.
Regularly review your cybersecurity practices and policies as to how your employees should protect your sensitive data and personal information. Be sure to include the consequences of violating your cybersecurity policies and practices and enforce them. Your employees must be held accountable for any infractions.
Administrative rights.
Admin rights should only be provided to the most trusted of your IT staff or contracted out to a professional IT Managed Services Provider (MSP).
Web pages
Protect all the pages on your public-facing websites – not just the sign-in and check out ones.
Never leave your business phones, laptops, tablets or other computer devices unattended. Don’t leave them out in public or even in a locked car.
These devices contain your sensitive business information and could fall into the hands of a thief.
Password protect and encrypt all of your devices.
Encrypt the data on all of your computer devices. Consider using full-disk encryption as well. This will lessen the risk to your sensitive business information.
Use encrypted websites when providing sensitive information.
Only trust websites that use encryption to protect your information being sent from your computer to their server. An encrypted website will use https at the beginning of the web address – look for this indicator on every page of the website, not just the page where you log in.
Routers
Make sure your router is set up securely. If you don’t, cybercriminals can gain access to your sensitive business information on your computer devices. Always change the name of the router to something else rather than the default it came with. Furthermore, change the router’s pre-set password to your own long and complex one. Ensure your router software is up to date by visiting the manufacturer’s website for new versions. Don’t use any remote management features – if enabled, disable them, and always log out as an administrator. (When it comes to setting up your network you should consider using an expert IT Managed Services Provider.)
WIFI Hotspots
When accessing WIFI Hotspots in airports, hotels or other public places only send information that’s encrypted. Be sure to avoid access mobile apps that require your personal, business or financial information.
If your business is compromised, make sure you take the necessary steps to inform the authorities. The Federal Trade Commission advises that you contact them as well. You can access their Data Breach Response Guide by visiting: https://www.ftc.gov/tips-advice/business-center/guidance/data-breach-response-guide-business
For more information about cybersecurity for your business, or a complimentary assessment of your overall IT security, contact our cyber security experts.

by Felicien | Feb 22, 2018 | Education
Stop Trying To Decide Between A Laptop Or A Tablet – The Real Question Is, Surface Book 2 Or Surface Pro?
Microsoft has a lot to offer when it comes to hybrid laptop/tablets – but which one is right for you?
Wondering whether to purchase the Surface Pro or Surface Book 2? Think about what matters to you most. Here’s a comparison based on their capabilities, design and more.
Price
The Surface Pro costs less than the Surface Book 2. It’s available from $799 for the base model up to $2,699 for the top-of-the-line version. The Surface Book 2 is bigger and more expensive than the Surface Pro, but it offers more in terms of performance. You’ll pay between $1,499 and $2,999 for the 13-inch Surface Book 2, and between $2,499 to a whopping $3,299 for the 15-inch model. Keep in mind that the Surface Book 2 comes with a much-improved full-size keyboard, while with the Surface Pro, you’ll need to purchase the Type Cover separately ($99 to $128 depending on the one you choose).
Power
Both the Surface Book 2 and Surface Pro are performers when it comes to power. However, the Surface Book 2 is a workhorse that outperforms the Surface Pro and most similar laptops on the market today. The Surface Book 2 uses Intel’s latest eighth-generation processor, while the Surface Pro (2017) features Intel’s seventh-generation processors. (Note: You can opt to get a Surface Book 2 with a seventh-generation chip, but if you’re doing this for cost purposes, you’ll probably be happier with the Surface Pro with a Core i7 processor.)
Battery Life
Longer battery life is perhaps one of the most requested features when it comes to mobile devices, and neither device will disappoint in this respect. However, the Surface Book 2 is a more suitable choice when it comes to battery life. The newest Surface Pro provides nearly 14 hours of battery life, whereas Microsoft promises up to 17 hours of battery life from the15-inch Surface Book 2.
Graphics
The Surface Book 2 outperforms the Surface Pro in terms of graphics. The Surface Book 2 comes with two graphics processors, a NVIDIA GTX 1050 on the 13-inch model, and an NVIDIA GTX 1060 on the 15-inch model. However, the Surface Pro provides a decent graphics experience with an Intel HD Graphics 620 or Iris Plus Graphics 640, yet these can’t compare to the graphics components in the Surface Book 2.
Screens
The Surface Book 2 has an Intel HD 620 GPU, making it a great choice for high-end graphics works. This is what makes the Surface Book 2 standout. The screen offers a 3:2 ratio with 3000 x 2000 pixels at 267 pixels per inch. However, both the 13-inch Surface Book 2 and Surface Pro have the same 267 pixels-per-inch (PPI) density. Either of these devices will deliver excellent colors, contrast, and brightness.
Memory and Storage
Both the Surface Pro and Surface Book 2 provide configurations up to 16GB of memory and up to 1TB of internal storage. The Surface Pro comes with 16GB of RAM and a 512GB SSD, and you can upgrade to 1TB for an additional $50. With the Surface Book 2, you can save hundreds of dollars by opting for the 256GB storage option rather than a 1TB one.
Weight
The Surface Pro is 1.69 pounds without a keyboard so you’ll never feel like you’re carrying a computer in your backpack. The Surface Book 2 weighs 4.2 pounds if you get the 15-inch model, and 3.62 pounds if you choose the 13-inch.
Cameras
The Surface Pro comes with two cameras for taking photos and recording video: an 8-megapixel rear-facing camera and a 5-megapixel front-facing camera. Both cameras can record HD videos in widescreen mode. The Surface Book 2 models all come with a forward facing 5-megapixel camera, and an 8-megapixel camera in the rear that can record in HD at 1080p resolution.
Ports
If port availability is what you’re looking for, the Surface Book 2 wins.
Ports are sparse on the Surface Pro because of its limited size, so it only has a single USB Type-A, mini DisplayPort, and microSDXC card reader. However, there is a headset jack, and a Surface connector (for power and docking). The Surface Book 2 includes a USB Type-C, two USB Type-A’s, and a full-size SDXC card reader. It has a full-sized USB 3.0 port, a mini-DisplayPort for video, an SD card slot, and an audio jack. Except for the audio jack, all the ports are on the keyboard base so they won’t come along with you when you detach the screen.
The Bottom Line is What Matters to You the Most.
The work you’ll be doing is the ultimate deciding factor when selecting between the Surface Pro and Surface Book 2. If you’ll be using graphic-intensive apps, and if you want to play today’s computer games, you’ll want to choose the Surface Book 2. If you need a device with more battery life, this is your best bet as well.
However, if you want an easy-to-carry, lighter computer for everyday use to use for email, web browsing, and document editing, the Surface Pro is probably your best choice.