
by Felicien | Aug 14, 2019 | Education
What You Need to Know About Android Malware
Hackers are devising new ways to infect phones with malware. Learn about the latest attack on Android phones and how to minimize your risk of getting malware.
Since the first computer operating systems hit the market, malware has been a serious security concern. Today, malware can infect not only desktop and laptop computers, but devices that are connected to nearly everything we do: our phones. In July 2019, cybersecurity experts found that up to 25 million Android phones were infected with malware masquerading as trusted apps like WhatsApp. Here’s what you need to know.
Imposter Apps
The latest malware threat was able to breach Google’s Android OS and replace legitimate apps with “zombified” versions that bombard users with unwanted ads. The outbreak affected approximately 15 million phones in India, 300,000 in the U.S., and nearly 140,000 in the U.K., making it one of the most devastating cyberattacks of the decade.
The malware was traced back to 9apps.com, a third-party app store owned by Chinese company Alibaba. Hackers that plant malware on these sites usually target users in developing nations, though this particular attack hit a significant number of phones in the states and the U.K.
Research thus far into the imposter apps found no threat apart from malicious ads. However, hackers that employ this type of attack can potentially do much more evil such as stealing user data, tracking user locations, and even accessing private messages.
How Does the Malware Work?
The malware is programed into a variety of apps such as photo editors, games, and messaging apps and made available for download. Once downloaded, the app runs the malware, which is often disguised as a harmless app update. The malware then corrupts popular apps such as WhatsApp, turning them into zombie apps that launch unwanted ads. In this case, the hacker’s end goal appears to be to trick users into tapping the ads and generating revenue via a pay-per-click scheme. Fortunately, the malware does not appear to affect other data stored on the phone.
Who’s Behind the Malware?
Experts have linked the malware to a Guangzhou company involved in developing and marketing apps for Android phones. While most of the carrier apps were made available on third-party storefronts, the hackers may have considered sneaking the apps onto Google Play. Researchers at Check Point are working closely with Google to identify and take down potential malware installers.
How to Protect Your Android Phone from Malware
A good first step in minimizing your risk of malware is to update your phone to the latest version of Android OS. Be wary of downloading apps on third-party stores, which typically have fewer security measures in place than the official Google Play store. Even after taking these precautions, you should still be proactive in recognizing red flags. For example, if an app suddenly starts displaying ads or behaving differently than before, it’s likely infected. To fix this, navigate to your phone’s app info list and uninstall ones you don’t recognize.
No matter how many security updates Google releases, hackers will find and exploit loopholes. You can help stop hackers by being aware and reporting suspicious activity on your Android phone to Google.
by Felicien | Aug 14, 2019 | Education
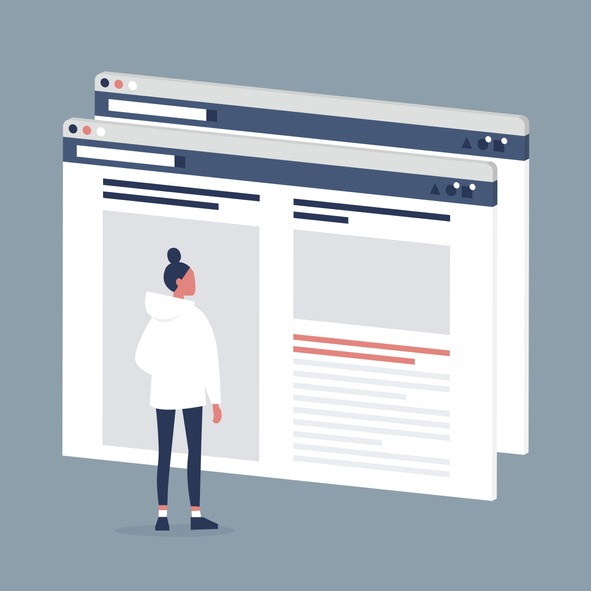
Save Time and Headaches by Searching Your Open Tabs Instantly
It is easy to lose track of which open tab contains the information you need when you are researching.
Use this Chrome tool to instantly find the right tab.
Do you do a lot of research online for work or school? Then you know that It isn’t uncommon to have 6, 7, or even more tabs open on your internet browser at the same when you are working on a large project. But with that many tabs open, you can easily forget which tab contains the information now. But don’t worry, Google Chrome has your back.
With Google Chrome, you will never again have to feel frustrated or waste your time clicking randomly on multiple tabs trying to find the one you want. You can just use the URL box, or what Google Chrome calls it’s Omnibox, to search your open tabs for the one you need. You may already be aware of some of the most useful tasks you can access directly from Chrome’s Omnibox such as solving mathematical calculations, checking the local weather or even finding files on your Google Drive, but did you know you can use it to search through your open tabs?
How to Use the Omnibox to Search Open Tabs
Enable the Omnibox search mode. The ability to search your open tabs is disabled by default. Before you can use it, you will need to enable the capability. You can do this by opening a new tab in your Chrome browser. Then in the Omnibox at the top of the page, type or paste Chrome://flags/#omnibox-tab-switch-suggestions. Hit enter on your keyboard. This will take you to a long list of options with Omnibox tab switch suggestions highlighted in yellow. Select Enabled from the dropdown menu just to the right.
Restart your browser. You will need to restart your browser to complete the process. If you are in the middle of a project, you may want to use the Relaunch Now button to remember your open tabs after restarting. Otherwise, close and restart your browser in the normal way.
Conduct your first search. After Chrome restarts, and you have at least two tabs open, it is time for a quick test. Enter text from the title of any of your open tabs into the Omnibox. As you type, you will see several suggestions popup under the Omnibox. If you want to jump to one of the open tabs, click on the Switch to this tab button next to the suggestion. This will open the tab immediately in the browser.
Everyone is looking for ways to streamline their workflow. This small tip will definitely save you a few seconds several times throughout your day, and significantly add to your productivity.

by Felicien | Aug 13, 2019 | Education
Finding the right scheduling software can make everyone happier, and thereby make everything run a bit easier and a bit more smoothly. Here is what you need to find in the optimal scheduling software program, and where to find it.
The medical field has always been an industry in which accuracy is key. From the moment a referral is processed to the moment that a patient leaves the office after visiting with their physician, accuracy, privacy, and efficiency are all fundamental components of what drives the medical experience. Even in a small doctor’s office, it is common for a single physician to have several hundred patients that they care for regularly. Therefore, the task of managing the caretaking of patients and their private information largely falls to the support staff. While scheduling appointments may at first sound like the least complex task to manage within a physician’s office, efficiency and accuracy in scheduling are pivotal in ensuring the success of the entire office. Taking advantage of a quality scheduling software can help to streamline the scheduling process, thereby helping to ensure that patients are scheduled when they ought to be, with the doctor they need to see, and all pertinent information is managed accordingly.
Shifting to automated online scheduling makes it easier to:
Provide patients with easy access to schedule appointments
Simplify the job of office staff workers
Streamline the functionality of a medical office, regardless of size
There are a few things that every medical office needs if it wants to run smoothly. A strong office manager, highly skilled nurses, and a caring physician are all important factors—but you can’t overlook something that has grown to become even more fundamental to the medical field, the right technology. Without the right technology, you could find yourself losing information, or even worse, making information too easily available to malicious eyes, and spending hours that should be reserved for better caring for patients instead of trying to deal with complications and redundancies in software.
Shifting to an intuitive scheduling platform can help to drastically streamline the appointment process and lead to improved morale among patients, office workers, and medical staff.
What is self-scheduling?
Self-scheduling is quickly becoming one of the biggest technology trends in the medical industry. This sort of software allows patients to use any digital platform, such as their home computer or mobile device, to schedule, reschedule, or cancel appointments at any time. This takes a huge burden off of office staffers, who are typically fielding calls throughout the day to manage appointments, while also providing a level of comfort and support to patients who are now able to schedule their medical appointments more inconspicuously, and without the need to wait on hold until an office staffer is available.
Patients appreciate the 24/7 around-the-clock nature of online scheduling, and office workers appreciate the reduction in time spent on the phone managing those appointments. Instead of speaking directly to all patients, office workers can instead focus on ensuring that incoming patients have ample time to complete their intake paperwork, processing necessary prescriptions, or any other number of tasks that are the responsibility of the medical officer manager, like dealing with the needs of patients with more complex issues.
Automated Waiting List
Putting it in the patient’s hands to schedule their own appointment at their convenience means giving the patient peace of mind to consider their personal commitments as they make an appointment, thereby making it less likely that they will have to cancel or reschedule. However, it also provides the patient with the opportunity to see the next available dates for appointments, and even to sign up for a waiting list for an earlier appointment, should one become available.
Online Scheduling: The Organized Option
The biggest benefit to shifting to an automated schedule is the organizational bliss that comes from putting all incoming information in one place. By utilizing an intuitive scheduling platform it is possible to cut down on wasted hours in the office, to reduce errors in scheduling by limiting overbookings and canceled appointments, and to ensure that all booked appointments are properly prepared for and the medical files necessary for each appointment are processed accurately. Office staff can easily work with the scheduling platform to match patients with the necessary provider, process insurance information, and fill in a provider’s schedule—all in one sitting. For a large medical facility, shifting to an automated scheduling system is a must-do to keep the office above water. For a small medical facility, this simple decision can make a world of difference in the level of functionality and productivity in the office.

by Felicien | Aug 13, 2019 | Education
Change Your Background Image on Chrome
Do you want to add a little bit of your personality to your web surfing and internet searches? It is easy with the Chrome browser and this simple guide.
Google’s is far and away the most popular search engine online. Besides returning helpful and fast search results, the website is streamlined and utilitarian in nature, letting visitors find the information they want without needing to deal with all the distractions of other search engines out there. And while the search bar on the home screen of Google’s Chrome browser is fine, some businesses and individuals may prefer a more customized experience such as adding a favorite photo or a company logo. Lucky, that is not a problem. Google, and the Chrome browser gives you the ability to choose any background image you want. And the best part is that’s it easy to set up!
How to Set Up a Personalized Google Background
Load your Chrome browser. Chrome is a fast, secure, and easy-to-use browser, so, if you don’t already have it, download it now.
Decide whether you want to use a pre-made Google theme or if you prefer to use one of your own photos. You can find a wide selection of pre-made themes to suit a wide variety of different styles and interests in the Google Store.
Choose the pre-made theme you want. You can access the Google Store by launching the Chrome browser. Once the browser loads, look for the icon with the three dots in a vertical row. It is located to the far right of the address bar. Click on the icon and choose the Settings option near the bottom of the drop-down menu. From the menu on the left side of the Settings page, select Appearances. A new menu will open in the middle of your screen. Click on Themes from the new menu, and you will have access to dozens of themes from landscape photos to Zodiac symbols. Once you find a theme you want, choose Add to Chrome. Now when you open a new tab, your new theme will appear.
Choose your own background image. Do you want to personalize your background even more? Then you can opt for using your own background image. You can do this by opening a new tab in the Chrome browser. On the bottom right of the screen is a button which says Customize. Older versions of Chrome may display a gear icon in the same place. Clicking on either will bring you to a Customize this page menu. Select Upload an image, and you can navigate to the file you want to upload. Once completed, open a new tab to make sure it worked.
You can always reset. Do you prefer the official Google page? No problem, you can easily reset. Click on the Customize or gear icon at the lower right of the screen and select Restore default background.
Now that you know how to change the backgroud image, go ahead and experiment. You will be amazed how making one small change can have such a significant impact on a tool you use every day.
by Felicien | Aug 13, 2019 | Education
How to Use iOS12 to Instantly Share Information With Colleagues
Want an easier way to communicate with your colleagues? Save time and reduce errors by learning how to instantly exchange information using iOS12’s share feature.
Beginning with Apple’s release of iOS8, it has been easier to share information, files and apps with others, including colleagues. The feature continues to be available in iOS12 as either an icon or a share link within apps. Individuals can share information within a message, an email, or by using AirDrop. The share feature also integrates with social media apps, such as Twitter and LinkedIn. iOS users can also share information with themselves through apps such as Notes and Reminders. The ability to seamlessly and instantaneously share information with others can boost productivity regardless of whether everyone is in the same office. By learning how to share files, images and media, employees can keep exchanging important and relevant content when urgency is a factor.
Using the Share Icon
With built-in iOS apps such as Photos or Safari, the share feature is available through the share icon, which is usually located at the bottom. In iOS12, the share icon resembles a single document or piece of paper with an arrow extending from the top. To share an image, a web page or link, or information within the News app, tap the share icon. In some of the built-in apps, the share icon will be located at the top instead of the bottom.
Besides news stories, articles, useful internet links, and images, location information from the Maps app can be shared with others. Venue information for meetings, conferences, and events that occur outside of the office can be exchanged without having to type all of the information within a separate email. Likewise, if one individual has written notes from an interview or something similar, the share icon is available within the Notes app to send it to the person that needs it. The act of retyping the information in an email or trying to describe it in a voicemail is no longer necessary.
Using the Share Feature
Some of the apps within iOS12 allow sharing, but do not display the share icon. The Contacts app is one of them. Employees can still share contact information, including name, phone number and email address using the “Share Contact” link.
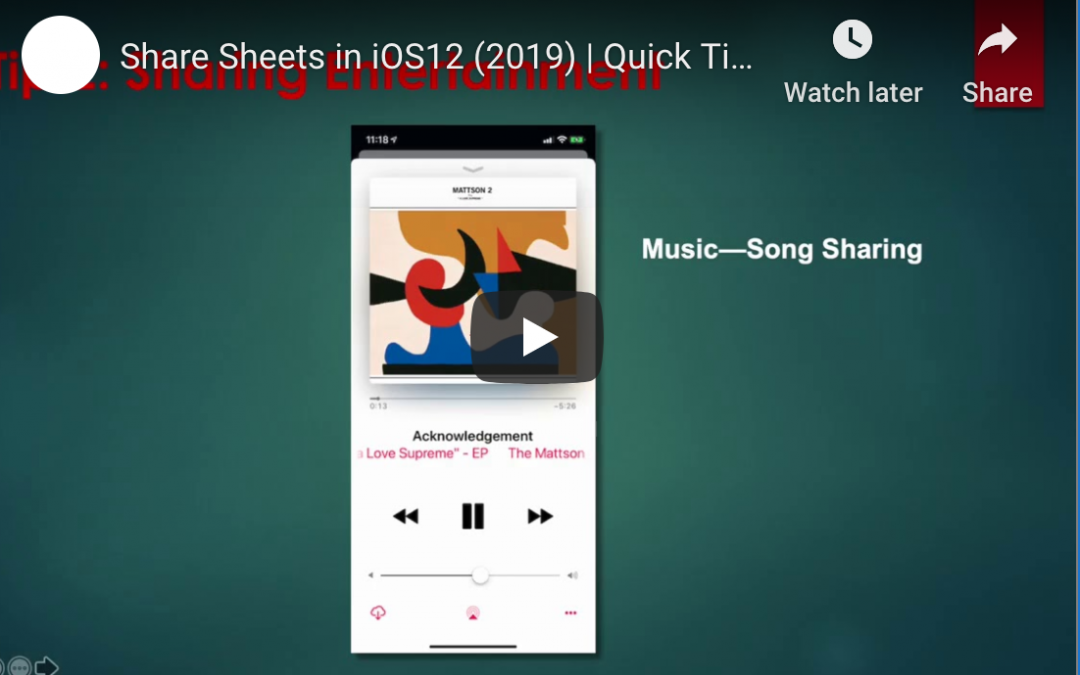
Apple’s iOS12 also displays its share feature with three dots within apps that contain music and videos. The three dots represent a menu that brings up a series of options, including the ability to share. Depending on the app and the media, one could see a “Share Song,” “Share Album,” or “Share Episode” link. Podcasts with useful tips and information related to one’s industry, discipline, and particular role can be shared this way.
The need to share information with colleagues is not new, but the ability to instantly share pertinent information and files in digital form is. Learning how to leverage built-in mobile tools can make the process easier, more efficient, and more accurate. Apple’s iOS12 share feature is one of those tools that can become critical to productivity while traveling or working remotely. With modern smartphone capabilities, waiting to share information or taking extra steps to ensure colleagues are kept in the loop no longer have to be part of employees’ normal routines.