
by Felicien | Nov 10, 2017 | Education
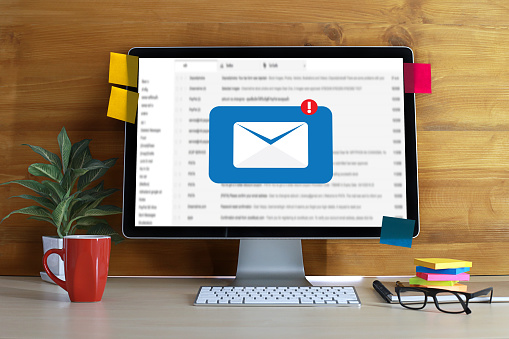
There’s no denying that email contacts are the modern-day equivalent of the traditional address book. For modern businesses, digital contacts are a company’s lifeline. They provide the means of connecting with clients, collaborating with team members and communicating important information to employees. Without an organized approach to setting up and maintaining these digital address books, communication lines can be broken and business productivity can take a hit.
A huge number of modern professionals use Microsoft Outlook to send and receive business mail. Whether businesses are using server versions like Exchange or cloud-hosted versions with an Office 365 subscription, developing streamlined procedures for setting up and managing Outlook contacts will save your business time and hassle.
Today’s Rolodex: Using Outlook Contact Lists to Streamline Business Communication
The contact list feature in Outlook has a variety of streamlining tools to make business communication easier than ever. For instance, with an organized contact list, new emails can be addressed simply by typing the person’s name or selecting it from your contact list. Additionally, if you’re detailed when building your contact list, you can add other personal info like mailing addresses and phone numbers. This allows businesses to use Outlook as their easy-to-manage and scalable ‘digital Rolodex’.
The process of building a contact list will vary among different businesses, depending on their situation. Some companies will be starting from scratch, creating an entirely new collection of contacts, while others will already have some contacts in place. Regardless, keeping an organized list of contacts is the best way to keep track of all the people you communicate with.
Building Your Contact List: Creating, Syncing and Adding New Contacts in Outlook
There are a few different ways to add contacts to your Outlook list. You can manually create a contact with all the necessary details. You can avoid manually adding contacts by syncing a pre-existing list from another webmail provider. You can select someone’s email address to manually add that person as a contact. Or you can use the Outlook Suggested Contacts tab to select familiar contacts to add. Let’s check out the details for each way of setting up contacts in Outlook.
Manually Creating a New Contact
Open Outlook.
Select the People icon in the lower half of the left side pane.
Select the New Contact
In the Contact window, enter all relevant contact details for this person.
Select Save & Close.
Syncing an Existing Contact List from Another Source
Export your existing list:
Pull up your online mail service using your internet browser.
Select the contacts you want to export and click on the appropriate export command.
Choose the option of exporting your contacts in Microsoft Outlook or Outlook CSV
Save the exported CSV file.
Import your contacts into Outlook:
Open Outlook.
Select File and then select Open & Export.
Click the Import/Export
In the Import and Export Wizard, select the option to “Import from another program or file” if it is not already selected.
Click Next.
At the Import a File window, select the Comma Separated Values option if it is not already selected.
Click Next.
At the next window, browse for and select the CSV file you exported from your webmail browser.
The next window will then provide three options:
Replace duplicates with items imported,
Allow duplicates to be created, or
Do not import duplicate items.
Select the option you want and click Next.
At the next window, make sure Contacts is selected as the destination folder.
At the final window, confirm that the CSV file will be imported from the Contacts
Click Finish.
As a side note: Export settings will vary among different webmail providers. For instance, with Gmail, you can select the contacts you wish to export, export a specific group, or export all contacts. However, with Yahoo, your only choice is to export all your entire contact list.
Creating a New Contact Using Email Address Selection
Right-click on an email address in a received or sent the email message.
From the popup menu, select the Add to Outlook
A contact card will pop up – enter any further contact details required.
Click Save to add that contact to your master list.
Using the Suggested Contacts Feature
Open the Contacts
Select Suggested Contacts in the left side pane.
Select the contacts you want to add to your Contact list.
Drag and drop your selections into your Contact list.
Managing Contacts in Outlook: Making the Most of Your Outlook Contact List
Once you have your Outlook Contact List started, it’s just as important to keep it organized. Making sure you weed out old contacts, verify that information is correct and up-to-date, and manage contact access will ensure that your entire staff experiences the streamlining power that Outlook offers.
Editing & Deleting Contacts:
There’s nothing worse than having a crowded contact list, filled with outdated or unnecessary contacts. Maybe you have old employee info to remove or maybe there’s a stash of an old client’s info that’s no longer relevant. Regardless keeping your contact list groomed is a great habit to keep.
Here’s the step-by-step process for editing or deleting contact info:
To view the details for any contact, double-click on the contact name or right-click on the name and select Edit Contact from the menu.
If you need to edit info, make the necessary revisions and when finished, click
If you want to delete a contact completely, just select the contact and use the Delete key on your keyboard. Otherwise, you can right-click the contact and manually select Delete from the menu.
Dual Contact View
This might seem like a strange feature, but viewing two contacts at the same time can be extremely helpful in organizing your inbox. Perhaps you have duplicate entries for a certain contact and you want to compare info to see which is most recent. Or, maybe you communicate with multiple people in the same office and want to make sure addresses and phone numbers match.
Regardless of the reason, here’s how to pull up two contacts at once in Outlook:
Double-click on the first contact you’d like to view.
Select the Cancel button to display the contact card.
In the card, click on the Pin icon to keep the card visible.
Double-click on the second contact and perform the same steps to keep the second contact in view.
Now you’re able to position the two contacts in a side-by-side view.
Click on the Edit link for each contact card.
Copy and paste information as needed, from one contact to the other.
When done, click Save for the contact whose information you revised and Cancel for the other.
Then, close each of the two contact cards.
Add Individual Contact Lists to the Outlook Address Book
To keep businesses even more organized and productive, the Outlook Address Book helps to centralize company contacts in one place for easy access. Using the Outlook Address Book allows you to access your contacts instantly from within an email message by selecting the To, Cc, or Bcc buttons.
Here’s a step-by-step process for adding your contact list to the Outlook Address Book:
Open Outlook.
Select the File
Select the Account Settings button, then select Account Settings again.
In the Account Settings window, select the Address Book
Make sure an address book is listed. If not, select the New
Select the option for Additional Address Books and click
Click Finish.
In the Contacts window, right-click on your Contacts list.
Select Properties from the popup menu.
In the Contacts Properties window, click on the tab for Outlook Address Book.
Click on the checkmark to “Show this folder as an Email Address Book” if it is not already checked.
Click
Here’s how to access and view contacts once they’re added to the Outlook Address Book:
Go to your email view and start a new message.
Click on the To field, and you should see your contacts listed.
Double-click on the contact or contacts that you want to send mail to.
Click any contact that you want to Cc and then select the Cc
Click any contact that you want to Bcc and then select the Bcc
Hit send and you’re all set!
As you can see, while business contacts are a straightforward concept, Outlook offers a variety of dynamic ways to create, maintain and optimize your digital address books. Staying on top of organizing and updating business contacts is critical to ensuring your company’s line of communication is working as strong as possible. Make sure your company is making the most out of the technology you deploy.
It should be noted that these step by step instructions are for the 2013 and 2016 versions of Outlook. However, the steps for earlier versions are quite similar. If you’ve recently made the switch to Outlook or if you’re looking to get on top of your Outlook Address Book once and for all, don’t feel overwhelmed. Making use of Outlook’s dynamic contact management features will have your digital address book neat and tidy in no time.

by Felicien | Nov 9, 2017 | Education
For today’s business owners, web presence is everything. Making an impact online is how most modern businesses generate leads and make an impact on their target markets. A big part of a company’s online presence is their domain name. Your domain names serve as your company’s internet address, inviting new and existing clients to explore your online headquarters.
Understanding the Basics: What is a Business Domain and Domain Name?
The domain name system is not terribly complex, but it can be tricky for busy business owners to fully understand and manage. In fact, many organizations turn over all control of their domain name to an external agency to manage. However, for those looking to learn a little more about domain name management, let’s explore the basics:
A domain name is a web address that defines a designated space on the internet.
Like a business’s physical address, a domain name is an online location where mail is received and customers can visit a business.
Simply put, a domain name is an address that directs online users to a company’s online domain – namely, their unique business website.
Domain names are also very often used for company email addresses, making it the primary way for clients and colleagues to stay in contact.
Breaking Down the Process: How Businesses Register and Optimize Domains
Now that we’ve got the domain-101, it’s important to get a handle on the key things about domain management that business owners should know. From registration to renewal, its critical for business owners to know the ins and outs of properly registering and strategically maintaining their online address.
Here are some key bits of information to help you better understand domain-name management:
What is the DNS?
DNS stands for Domain Name System. The DNS is a server that translates a web address into one or more IP addresses.
What’s an IP Address?
Your company website lives on a web server and has a specific numerical address assigned to it, called an IP Address, which stands for Internet Protocol Address. IP addresses are made up of four segments separated by a period, like 123.456.789.123.
What is a Name Server?
Name servers are machines that route domain names to the proper IP address. When a company’s domain name is assigned to a set of name servers, the name servers have the authority to direct the domain name anywhere. Name servers are usually implemented by the vendor that hosts a company’s website.
What is a Domain Search?
Before a company can put their ideas into action, they need to ensure that the domain name they have in mind is available for use. There are plenty of resources online that help business owners search for available domain names and select alternatives if needed. Check out some of the leading domain name search tools here.
What is a Domain Registrar?
When you decide on what your domain name should be, it must be externally registered with an entity called a domain name registrar. A registrar is a company that issues and manages domain name registration for an annual fee. Check out some leading domain registrar sites here.
Don’t Let Your Online Headquarters be Sold to The Highest Bidder: Managing Domain Expiry & Renewal
Ok, so you choose a domain name, you search and find that it’s available. You make sure it’s registered, and you’re done, right? Wrong. Domain name registrations expire and must be renewed upon expiry. Business owners who don’t renew their domain name registration in a timely fashion, risk having their online address be put back up for grabs on the world-wide-web.
Even more challenging? When many business owners are getting started and launching their website, they often enlist the help of a tech-savvy friend or one-time tech contractor to get the domain set up and registered. Then, when expiry is looming, business owners are scrambling to figure out how to log in and make sure domain information is updated and renewed. In worst case scenarios, business owners are only made aware of this once their domain is already expired.
While many companies outsource a lot of their web-management responsibilities to an external digital agency, domain name management is the one part of web presence that business owners must have a handle on themselves. Why? As mentioned, a domain name is an address for your company’s online headquarters. It controls how new and existing clients access your website and reach out to you by email. Keeping tabs on managing this critical piece of business helps ensure your unique web presence remains untouched.
It’s also important to note that, while extremely important, domain name management is not that difficult for businesses to control. As long as you have a handle on the domain name expiry and renewal processes, you can put strategies in place to ensure you’re never unexpectedly evicted from your online office.
Here’s a rundown of the various steps in the domain-name expiration and renewal process:
Domain name registration expires
Quite simply, expiration happens when a company does not renew their domain name before the expiry date. However, businesses are given a bit of a break. Once a domain name expires, the domain is placed under the status of a Renewal Grace Period.
During the Renewal Grace Period, a company has the chance to renew their domain name without any additional fees. Renewal Grace Period length varies among different registrars.
Renewal Grace Period Ends
Once the grace period is over, the expired domain name is then placed under the status of Registrar Hold. This status holds expired domain names for 30-45 days, during which business owners still have a chance to renew their domain. However, they will likely pay a redemption fee of approximately $100, depending on their domain registrar.
During Register Hold status, registrars can attempt to sell the domain name to the highest bidder in an open auction. However, if the domain is sold, the buyer must wait the full 30-45-day period before the domain is handed over. If a company renews their domain before the Register Hold period ends, the auction buyer will be refunded. If it the domain is never renewed, it will be transferred over to the auction buyer at the end of the Register Hold status.
Registrar Closeout Sale
If a domain is not renewed by the original owner before the end of the Register Hold period and is also not sold at auction, some registrars attempt a closeout sale once the 30-45-day Registrar Hold has ended. Closeout sales usually offer expired domain names to buyers at a discounted price. Many registrars even go further to waive registration fees during closeout sales, increasing the incentive to buy.
While not all registrars use closeout sales, they are successful for those that do. Sales are first come, first serve and they move quickly – with cheap, expired domain’s flying off the digital shelves.
Registrar Released to Registry
If the domain name doesn’t get renewed or sold, the registrar then releases the domain name to the registry, where it is placed under Redemption Period status. Under this status, the domain cannot be modified or deleted. This status gives original owners one last chance to restore their domain by paying a redemption fee. This status lasts for a maximum of 30 days.
However, it’s critical to note that once a domain name enters the Redemption Period status, a company’s website and email addresses will stop working. Business communications will halt and clients will not be able to access your online headquarters.
Redemption Period ends
Once the Redemption Period status ends, if the domain has still not been renewed, it is then transferred to Pending Delete status. Pending Delete status lasts for five days, during which it cannot be restored by the original owner or the registrar. Company website and email addresses will remain inactive.
Domain name deletion
Once the 5-day Pending Delete period ends, the domain name is deleted and dropped from the online registry. As soon as it’s deleted, it becomes available for registration by the general public.
While it’s apparently possible to manually re-register an expired domain name as soon as it’s been deleted, the chances of success aren’t great – especially if the domain name is potentially valuable to others.
Keeping Your Domain Name Safe: Strategies for Locking Down and Maintaining Your Online Presence
The leading reason companies lose control of their domain is that they realize far too late that their domain name had expired. Therefore, it’s critical for business owners to implement standard policies to manage domain name maintenance and renewal. Even companies who think they have domain name management under control should make a conscious effort to prevent an expiry crisis.
Set an annual date to check-in on domain-name expiry. Keep your eyes peeled for renewal reminders from your registrar in your inbox. If your domain is set to renew automatically, it might fail if your account billing info is outdated. Make sure to keep tabs on the billing information on your domain name account to ensure registration fees are paid effectively.
Here’s a list of other key strategies for managing domain name renewal:
Use a separate email address for the accounts you use to manage your domains. This will avoid communication issues if your email is rendered inactive in case of expiry.
Keep and store registration and ownership records and account access details. Make sure this information is stored in a safe and easily accessible place that you’ll remember.
A designated person should be bestowed with domain-name control responsibilities. It’s recommended that this responsibility remains with the business owner, however, if you’re going to delegate, be sure to transfer the responsibility to a reliable and trustworthy employee who’s in it for the long haul.
Make sure your domains are renewed before expiry every year. Keep track of domain records, account and billing information and renewal history to avoid any confusion or misunderstandings.
Keep open lines of communication with your domain registrar. Ask them explicitly to consult with you directly before any domain changes are made and make sure they know the best ways to reach you.
In a business landscape that is increasingly web-based, taking care of your online headquarters is just as important as maintaining your physical office space. A unique domain name gives you a chance to creatively present your business online and develop a unique web presence. Making sure your online address stays secure and well-managed is critical, because an expiry notice can quickly become an eviction notice.
by Felicien | Nov 8, 2017 | Education
Sending an email doesn’t guarantee that your recipient will take action. Create a compelling call to action and get the boost in response (or sales) that you need without lifting a finger!
Anyone writing an email will tell you that they’re dreaming of the thousands of visitors coming to their site, or purchasing their products and services simply on the merit of a single email. While this scenario isn’t entirely realistic, there are ways that you can optimize the call to action (CTA) on your email, and boost responses from 2-4 percent up to 11-15 percent depending on the audience and the offer. Even a not-so-great offer can take on a life of its own if the messaging is consistent, on brand and timely for the reader. Want to improve the responsiveness of each business email leaving your building? Keep reading for killer CTA tips from Karen Turner at Turner Efficiency in Calgary, Canada, that will keep your customers clicking.
Clean and Concise
There is often a tendency to overshare via email, as it’s a great way to get all of your thoughts down on paper and deliver them to another individual or group. However, is the recipient ready for all of those details? Creating a wordy or overly-involved email may be a great way to have your message ignored completely. Think about it — if you’re in a rush for time, and you receive an email with multiple paragraphs, are you more likely to read it or save it for later “when you have time?” Unfortunately, more emails roll in after the one you’re saving for a free moment, and before you know it several weeks have passed and the sender is still wondering how you want to take action on the project.
One Subject, One Email
Along with creating a clean, simplified email message, it’s important that you only attempt to tackle one subject at a time. People are incredibly distracted and have little time to focus. When you begin an email with one subject and then shift halfway through, you’re reducing the chances that your recipient will act on any of the items listed! Sure, it may feel more efficient to list a variety of actionable items per email, and in some circumstances such as a meeting followup or project management email that works. However, in selling emails or when you’re attempting to get a quick response from a colleague, the rule of one subject per email is the most effective and efficient method of communication for action.
Action + Urgency
Don’t be afraid to use action terms to detail how you would like your recipient to respond. People are much more likely to give you the go-ahead and take the next step in a process when they clearly understand what you’re asking them to do. Create a sense of urgency by listing a specific time and date by which you need someone to take advantage of an offer or respond to a request. As soon as possible can be interpreted differently depending on your point of view, so avoid using this language if you want to drive real responses to your emails.
Get Noticed
Finally, look for ways to stand out from the crowd! Whether this means through personalization for your audience or a tactic such as an interesting image, different font colors for action words or underlines, find a way to make your email look engaging and interesting enough that your audience wants to take action. Boring is definitely not “in!”

by Felicien | Nov 8, 2017 | Education
Non-profits that utilize technology find that it creates engagement, automates the fundraising process, improves emergency response time, and leads to higher levels of success.
“Before the Parade Passes By,” the great song from the Broadway smash musical, “Hello, Dolly,” talks about getting ready to move out front while there is still time left. When it comes to fundraising, though, non-profit organizations that don’t jump on the technology bandwagon could indeed find that the donor world is passing them by. In a world where it seems like donors hold onto every single penny with every ounce of their strength, how can you shake the money tree to get their dollars to fall into your coffers?
Donor and volunteers alike are pulled in multiple directions by the extraordinary number of non-profits looking to capture their attention. It used to be that local charities only had to compete with each other, and the occasional United Way or March of Dimes appeal. Now it seems that every local incident, national tragedy, or natural disaster spawns a monumental fundraising effort. Even donors who previously contributed on a regular basis suddenly find they don’t have enough discretionary income left at the end of their paycheck.
Although certain organizers have no problem starting a GoFundMe page at the drop of a hat, it seems like the more established, traditional non-profits are stuck in a well-worn rut. They send out the same address labels and yearly calendars, host the same fundraisers, and rely on the same celebrities, but really don’t pay too much attention to building strong relationships with their donor base. Maybe they have a website, but they shun other techniques which could really raise their online profile and radically change the game for them.
But who says non-profits can’t use technology to raise awareness while doing good? Not Microsoft, of course. Although they have a vested interest in every entity using technology, they make quite the case for using it properly. In their white paper, “The New Imperative of Nonprofit Digital Transformation,” they lay out a convincing case for non-profits to follow the lead of their for-profit brethren by incorporating technology into the everyday mentality.
Using Technology Improves Donor Engagement and Participation
Although technology can certainly play a key role in making the non-profit function more cost-efficiently and can be used to keep tabs on volunteer activities, its main benefits can be seen in the fundraising arena. Take a look at these key ways technology can help raise the level of fundraising to previously-unreachable heights:
Technology can automate the fundraising process: Even the most loyal of donors might be tempted to donate elsewhere if they don’t feel appreciated enough. Instead of performing a mad dance to orchestrate a once-a-year fundraiser, technology can spread out the process of asking over the course of a year. Your non-profit can create a schedule of events, build messages around them, and close with a giving reminder. Schedule them into your online system to automatically send emails and update social media pages, and you’ll stay at the front of your donors’ giving queue. Once they take an action, an automatic email can be scheduled to provide the appropriate thanks.
Technology creates engagement: Donors today like to be involved and know what their favorite non-profits are doing. Use regular Twitter, Facebook, YouTube and Pinterest conversations to highlight your success stories, and show them how their money is being used.
Technology builds a data warehouse: Every non-profit organization has one-time donors, regular donors, and everything in-between. The secrets to success are to make the one-time donors become regular donors and to keep the regular donors captivated. But this can be hard to do if you don’t know which donor is which, how much they like to donate, or whether they have a preferred donation time period. Collect data religiously and then use Customer Relationship Management, or CMR, software to build a donor database so your organization can study it, and communicate more effectively to achieve the best results.
Technology helps your organization respond in an emergency: Social media is the workhouse of online communications, and your organization can use it to stand out from other non-profits clamoring for a limited audience with limited funding capabilities. Use your social media network to raise awareness for a specific activity, or respond quickly to a tragic event.
Technology gets your non-profit where your donors are: Donors are not sitting at home waiting to get that next letter from you. They are out and about, performing a wide array of activities, and using their mobile devices to keep up with the rest of their lives. Use technology to become a mobile-responsive organization, and you’ll be ready to connect whenever and wherever your donors decide they want to get in touch.
How Can Your Non-Profit Get Creative With Technology?
Using the fundamental donor and database management capabilities is the first step to ramping up your non-profit success, but why not get creative and use technology in other ways to accomplish your goals? Some examples might be:
Offer online volunteer sign-up forms.
Accept online donor payments easily in multiple formats.
Promote online ticketing for events.
Sponsor a Facebook fundraiser.
Hold a silent auction online.
Create a cool app.
Automatically Tweet out the results of your next fundraising campaign.
Add a “Donate Now” button to your website and Facebook page.
Find a partner to promote a matching campaign, and provide updates on creative fundraising efforts on your social media pages.
Conduct a quick donor or volunteer survey.
Make it contagious. Remember the Ice Bucket Challenge, the awareness it raised, and the amount of money it garnered? And it all started with an online video and a dare. Get your donors involved in doing something creative online, and use the publicity to propel your non-profit to newer heights.
Hitch a ride on a wildly successful online non-profit event by getting involved in #GivingTuesday on the first Tuesday after Thanksgiving. Now in its sixth year, this event reminds us all of the importance of participating in acts of kindness and makes us wonder what we can give to make our world a better place. Create your own local challenge under the #GivingTuesday umbrella, and then use social media to drive and direct requested donations of time, money, resources, and talent. It’s the perfect way to get one-on-one with your donor base and build towards end-of-year charitable donations. Register online at the https://www.givingtuesday.org/ website, and be sure to download the #GivingTuesday Toolkit for some terrific social media ideas.
Answer The Call of Technology Now
For much too long, technology has been used by only larger non-profits or for-profit organizations to increase communication, maximize effectiveness, and support profitability. But there really is no reason why non-profits of all sizes should not carefully integrate technology into their everyday activities to help support their mission and ensure compliance with regulatory overseers.
There is no difference in the types of technology that are available to non-profit and for-profit organizations; the only difference is how that technology is utilized. Non-profits can easily find cost-effective solutions that help meet their unique administrative, communication and service needs.

by Felicien | Nov 8, 2017 | Education
There’s a running joke for modern times. If you were to die unexpectedly, you should have a close friend on notice to clear your internet’s browser history to destroy your most embarrassing and private online footprints. However, as the technology landscape continues to change, data that was once considered private now exists in an ambiguous territory. Basically, we’ve reached a point where internet users can never be really sure that what they type into search engines is completely private.
More and more, advertisers and consumer researchers are making use of data trails – and Internet providers are helping them on this mission. In fact, for many internet providers, it’s become common practice to put user’s internet histories up for grabs by selling them to advertising and market research agencies. This makes it easier for marketers to target individuals with products and services that match their specific interests.
Browser Histories for Sale: Trump Passes Rolls Back Internet Privacy Rules
Earlier this year, President Trump signed a measure to reverse cybersecurity rules that would have required internet providers to get consent before selling consumer browser histories. The rules had not yet taken effect, but internet providers now officially have the freedom to collect and sell user data – including browser search histories.
Data collection by internet providers isn’t new. For some time, providers have already been collecting data to maintain their networks. While many providers claim they won’t use or sell personal data – like children’s information, medical records or banking details – without consent, it’s becoming clear that little bits of this sensitive information is available in browser histories.
Take for example a person who googles health symptoms they may be experiencing or an individual who googles the address and transit number of their personal bank. With browser histories up for grabs, there are serious concerns about the possibility of identifying people based on these little pieces of detailed information. Not to mention, if the information is sold to the wrong buyer, these data trails increase the risk of cyber hacks and identity theft as well.
Business Considerations: Understanding Browser History Implications for a Team of Employees
The risks that data trails pose for businesses are even more dangerous. A team of employees in a modern business office probably relies on internet searches daily. Perhaps their searching work-related things like competitor and client data or maybe their searching for personal things during downtime. Regardless of what they’re searching, every word that gets typed into a search engine is connected to a business’s online data trail.
This means that if an employee uses google to get more information about a confidential company project or to try and track down contact information for a client, these search details are stored and ready to be sold. Even worse? Relying on employee’s personal searches can make it easier for cybercriminals to create data portraits of employees. This significantly heightens the risk of identity and phishing scams, where criminals convincingly impersonate company representatives to gain further data access or steal company resources.
Quick Case Study: How a Fake German Marketing Company Scored Employer Data Trails for Free
The Guardian recently published an expose on the browser history issue and it unveiled shocking results. Journalist Svea Eckert and data scientist Andreas Dewes, both from Germany, wanted to find out just how easy it was to collect browser history data in the attempt to identify users.
The pair underwent an experiment, posing as a phony marketing company to acquire the data they were looking for. They even created a fake company website and a bogus LinkedIn profile for the company’s “CEO”. They claimed to have developed a machine learning algorithm that could improve marketing tactics but told internet providers that they needed to ‘train’ the algorithm on a large collection of data – a common request by research firms worldwide.
The pair were successful in acquiring the data and didn’t even have to pay for access as they claimed they were doing research. The team presented their findings at the annual Def Con Hacker Conference in Las Vegas. A summary of their findings is listed below:
After contacting several internet providers, Eckert and Dewes were able to easily acquire a database holding more than 3 million visited web addresses. That data, in turn, comprised about 9 million unique sites visited by roughly 3 million German internet users.
The data clearly demonstrated different groups of internet users. First, the light users who visited only a few dozen sites over a 30-day span and second, the heavy users – some of which had tens of thousands of data points waiting to be examined.
Though the data was of course ‘anonymized’, the pair had little trouble reassembling it to create identifiable ‘data portraits’ once they dug in.
Identifying some users was incredibly easy simply by checking out their uniquely identified URLS’s like social media profiles or analytics searches on personal Twitter pages. This made it easy to connect certain browser histories with a specific identity right away.
However, even for users who didn’t have unique URL histories to tip off their identity right away, Dewes and Eckert claimed that using the data to come up with digital fingerprints made educated guesswork easy.
The data portraits are built using the process of elimination. Take for example an employee visiting the company’s website and then quickly checking out their bank’s website for personal finance info. If an employer has 500 employees, but only 50 of those employee’s use the bank in question, it makes it easier to shrink the pool of possible identities that could be linked to this browser history.
Then, the pair worked to shrink the identity pool even more. By checking out medical conditions, hobby interests and school websites that employees may visit during the workday, it becomes easier and easier to match specific browser histories with specific employees. The more data points that are available, the better the chances of dwindling down overlaps and the more quickly a single person can be linked to a specific history.
While the process may seem time-consuming and complex, it really isn’t as hard as it seems. Eckert and Dewes claim that it only takes about 10 URLs in total to be able to uniquely identify a user.
Managing Your Businesses Online Footprint: How to Strategically Protect Your Business
So, how can businesses and individuals alike better manage their browser history to avoid having sensitive and/or identifiable information sold to the highest bidder? We’ll break down how it works and explores strategies for protection below.
Breaking down the browser history file:
When you visit a Web site, your browser automatically saves the Web site address, or URL, and saves it on your hard drive in a history file or folder. This file/folder allows you to view a list of previously visited Web pages, without having to type the address again.
The size of your history file will grow as you browse until it meets the limit set by your browser. However, it should be noted that these limits, for most providers, are quite large. When this happens, your browser will delete some URLs, starting with the oldest. This means, no matter how big your browser history file becomes, it continually replenishes itself with the latest data you’ve searched.
These files – full of personal and identifiable information, are owned by internet providers who can then sell the data archives to marketers, advertisers, and researchers. As noted in the case study, buyers are then able to use a process of elimination to link browser histories with actual people.
Head spinning? Check out these strategies for reducing browser history risks:
Set Regular Browser History Purge Dates
Even though your browser replenishes itself automatically, clearing your history manually on a regular basis is a smart strategy. Not only does this keep browser history files small and harder to identify, regular browser history purges may help speed up your system as well.
Set regular dates – perhaps bi-weekly or monthly – where employees are expected to purge their search data and keep history files small. This will not only help avoid identification, but it will empower your employees to be more vigilant with their online searches at work.
Make Sure Personal and Work Devices Aren’t Syncing
In a modern business world, many employees use a combination of company and personal devices to get work done. On some devices, the browsing data can be synced from one machine to another, which can result in browser history files becoming larger and jam-packed with personal search data.
To make sure your team’s personal devices don’t sync with company devices, check out these tips and tricks for Google Chrome: www.appuals.com/how-to-stop-google-chrome-from-syncing.
Explain the Dangers
The best way for employers to minimize the sale of browser history gold mines is to inform employees. Explain the risks to your staff members and help them understand that while internet searches may seem quick and anonymous, digital footprints are always recorded and can be used against them.
Arming your team with the knowledge they need will not only help reduce risk, it will also encourage team members to avoid making personal searches at work. This results in higher productivity, more informed team players and safe company data. Win-win.
The internet is becoming a massive and prosperous place to do business and get work done quicker. However, at the same time, the internet is becoming an increasingly public and non-private space, filled with marketers and cybercriminals, eager to get their hands on valuable data. Keeping these strategies in mind to protect your business is absolutely critical in a modern business environment. Don’t let the information highway drive your business into crisis.

by Felicien | Nov 7, 2017 | Education
It’s a thorn in the side of every modern business. Emails seem to come in faster and faster every day. Even when spam and unnecessary communications are moved to the trash can, inboxes are still jam-packed with important attachments, electronic pay stubs, and critical communication histories.
When employee inboxes get full, business communication can get muddled and backed up. Emails are missed or lost among a crowded sea of old but important communications. For businesses who rely on quick and efficient lines of communication, crowded inboxes can result in the disappearance of critical info and in worst cases, missed business opportunities.
Benefits of Inbox Archiving: How Outlook’s AutoArchive Feature Drives Unparalleled Organization and Productivity
Luckily, businesses who use Microsoft Outlook as their email platform have the ability to archive emails and keep them stored away out of sight. Archives keep old but important communications safely stored away to be easily pulled up when needed. Even better? Outlook has an AutoArchive feature which allows employees to automatically archive their inboxes at regularly scheduled times.
Outlook’s Auto-Archive feature offers a variety of business benefits including:
Keeps Inboxes Light
First and foremost, Outlook’s AutoArchive feature helps keep inboxes light and organized. This makes searching for information and important communications easier on a day-to-day basis and avoids disorganized employee communication.
Streamlined Automation
Implementing technology is supposed to help businesses complete tasks quicker and more efficiently. Outlook’s AutoArchive works quietly in the background, archiving and organizing company communications without hindering an employee’s workday with tedious tasks.
Customizability
Perhaps the best part about Outlook’s AutoArchive feature is that it’s not a one-size-fits-all solution. The feature offers a variety of customizing options including choosing the time and date for archives and organizing custom archive storage folders for easy search and access.
Managing AutoArchive: Security and Management Considerations to Keep in Mind
Like with all technology tools there are some drawbacks to keep in mind when using Outlook’s Auto-Archive feature. Keeping the following considerations top of mind will make sure your businesses take advantage of Outlook’s AutoArchive feature effectively and securely.
Manage Archive Size
One drawback of the AutoArchive feature is that over time, as emails are stored automatically, the sheer size of inbox archives can get huge fast. This can make searching for stored information more difficult and time-consuming.
It can also make the job of anti-virus scans harder. Setting semi-annual dates to clean out archives and clear out unnecessary communications is a great strategy to make sure archives sizes don’t become unmanageable.
PST File Corruption Issues
Another challenge with large archive sizes is the potential for PST File corruptions to occur. PST file corruptions make certain email files impossible to access and open.
PST file corruptions can also occur from power-outages as well as faulty networking or hard drive issues. In light of this risk, business owners should keep PST repair applications in their back pocket.
Archives are NOT a Back-Up Solution
This final consideration is possibly the most important. Having email data automatically archived and stored can make professionals think their email data is safe from cyber attacks or network failures. It must be made clear: AutoArchive is not a data-backup solution.
Archived emails are susceptible to technical flaws and do not include current inbox contents. Additionally, in the case of a crash or attack, restoring archives may not always be possible. This reinforces the critical importance of having external back-up and business continuity solutions in place for email data.
Business Implementation: Setting Up AutoArchive in Outlook
Keeping the previously mentioned challenges in mind, businesses can easily take advantage of the benefits of Outlook’s AutoArchive feature. The feature is available for versions of Outlook dating from 2007 and beyond and offers custom options for how AutoArchive runs, where it stores archived items and how long Outlook keeps items before archiving them.
Follow these step-by-step instructions in your employee inboxes to get AutoArchive up and running:
Click File> Options > Advanced.
Under AutoArchive, click AutoArchive Settings.
Click the Run AutoArchive every # days box and specify how often to run AutoArchive.
Choose any other options you want, such as having Outlook delete old items instead of archiving them.
Change the AutoArchive settings for an individual folder
In the Navigation Pane’s folder list, right-click the folder you want to change, and click Properties.
On the AutoArchivetab, choose the options you want.
HEADS UP: Archive and AutoArchive might not be available if a mail profile connects to an Exchange Server. It’s also possible that some companies may have a mail retention policy that overrides AutoArchive. Determine how your email network is set up ahead of time to avoid these obstacles.
For full details about AutoArchive settings, see AutoArchive settings explained.
Don’t Let Overflowing Mailboxes Bog Your Business Down: Take Advantage of Outlook’s AutoArchive Feature Now
No matter your industry, employee inboxes are susceptible to overcrowding. Email can fill your Outlook Inbox quickly with new messages, replies, and forwards. Before you know it, thousands of messages could be weighing down individual mailboxes. Keep your Outlook inbox and its folders under control seamlessly by setting up the AutoArchive feature.
Outlook is jam packed with hidden gems that are designed specifically to drive organization and productivity for businesses. Understanding how to best implement such a large tool-kit of resources can be overwhelming for the busiest of business leaders. Reach out to local tech experts if you need guidance and make sure your company is making the most out of Microsoft tech tools.